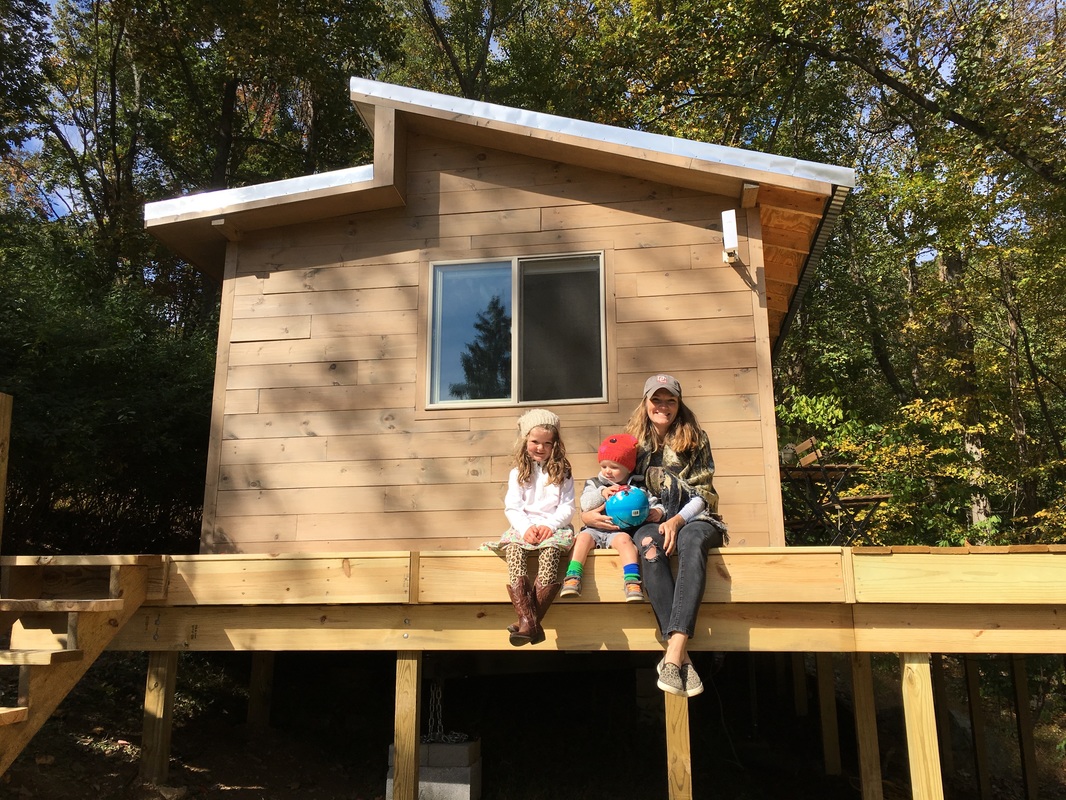
Tiny House Recap

After
living for years in traditionally scaled homes, we sold our last house
and moved to an apartment to try living in a smaller footprint. We
didn't miss the space, we loved ditching our mortgage and we found
ourselves firmly on the path to living more sustainably.
We finished this house and moved in about 15 months ago. People late to our story have asked about our build, so I figure it's time for a retrospective.
We finished this house and moved in about 15 months ago. People late to our story have asked about our build, so I figure it's time for a retrospective.

Site prep. We
were fortunate enough to have a friend invite us to build on a corner
of her 5-acre property in the Blue Ridge mountains. We cleared and
leveled (or partially leveled) a site for our house, with enough room to
build a separate screen house which went up first. (More on the screen house here.) We scavenged old boards and used them to build a retaining wall, then reinforced the wall with stones from the woods.

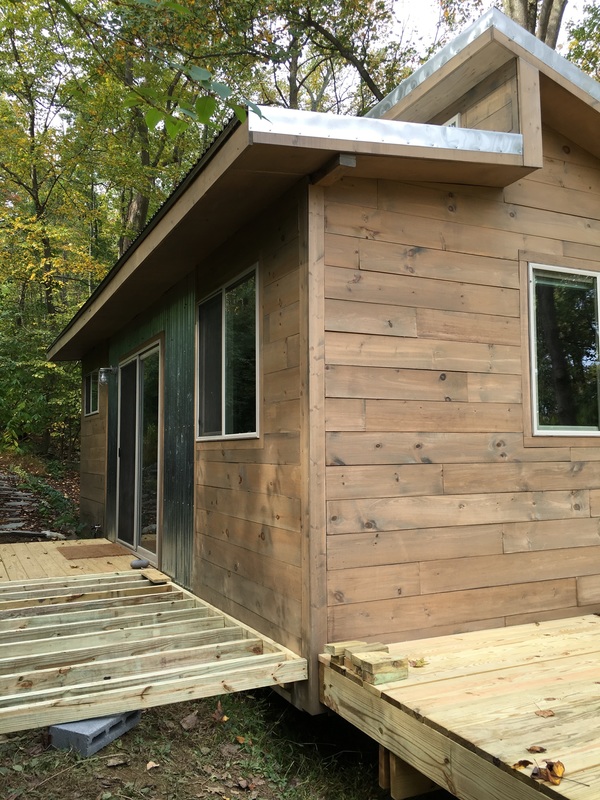
The trailer. Zoning doesn't allow a second foundation-built house on the property, so we built on a trailer. Ours is on a 24-foot equipment trailer
from Tiny House Builders of Georgia. Our design runs the full 24' of
the trailer and extends over the bed two feet on both sides. We used 10"
joists to raise the floor over the wheel wheels; it also left us plenty
of room for insulation). Bill drilled holes through the trailer to
attach the joists and bottom layer of plywood with 6" lag screws.

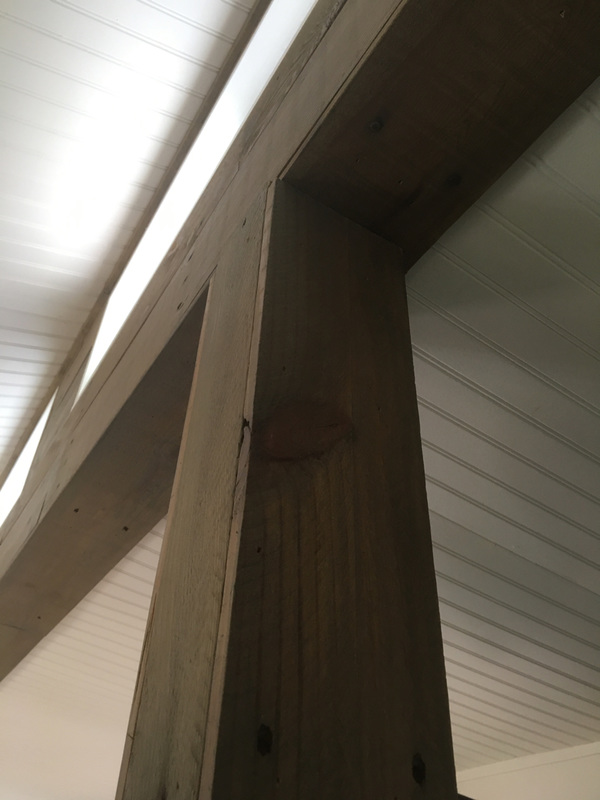
Framing.
We went with a "stick built" house on 24" centers (sometimes referred
to as advanced framing). The technique saved us a little money (by using
less wood) and reduced the house's overall weight. We designed the framing
in about 8-foot sections so that it would be easy for the two of us to
lift pieces into place and attach them. We put up four 4x4" posts to
carry the weight of the roof, since we decided to go with a split roof
design that incorporated clerestory windows.

Roof. After a couple months of tarping the build site for rain, we were thrilled to roof the house. We
installed a beam and framing for the row of clerestory windows between
our two rooflines, then hung rafters and screwed down plywood decking.
On top of the plywood, we went with a layer of WeatherWatch instead of
roof felt for more leak resistance. On top of that went panels of
corrugated steel fastened using screws with rubber washers. Bill bent
the flashing out of strips of galvanized steel.

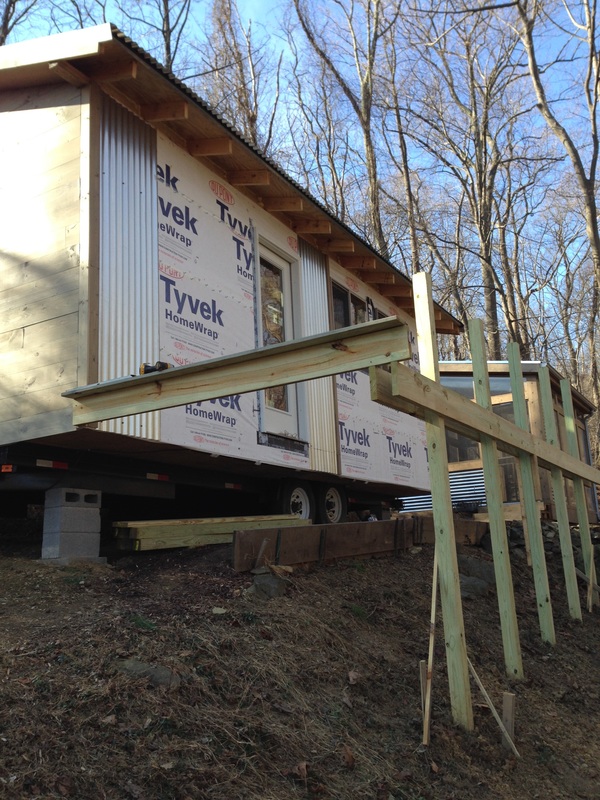
Sheathing and house wrap.
Plywood installed on the exterior studs made our build look more like a
home. After cutting out the spaces for our windows and doors, we
swathed the house with Dupont Tyvek HomeWrap. We'd talked about adding a
rain screen which would leave a gap of air between the house wrap and
the siding yet to come...but we forgot. Rainscreen helps control
moisture. (You can read more about it here, for more information.) So far, so good here without the rainscreen.

Windows and doors.
We knew we wanted a lot of light and cross ventilation (no air
conditioning) in our house. We looked at second-hand windows, but
finally decided we didn't want to take the time to scavenge the exact
sizes we wanted. The best deal we found was for Jen Weld windows and
doors at a local lumber yard. We made a last-minute decision to swap out
one window for a third door when we thought about building a deck. So, 11 windows and three glass doors it was.

Siding. We wanted to break up the sides of the house by using wood and metal siding. Our
final choices: corrugated steel (same as the roof) and wood clapboard
(stained the same color as the screen house). Snow came before we could
finish the siding, and eventually our progress crawled to a stop. We
took a few months off and finished the last side and the eaves of the
house in the spring. We started the eaves with super light-weight
panels, but switched to thicker plywood by the end.

Wiring. Our electrical plan got a little complicated when we decided to go solar as much as we could afford. We found a solar generator (the SolMan classic
by Sol Solutions), and Bill designed the wiring to go to two boxes. All
the lights and most outlets are wired to a box powered by our
generator. The hot water heater, water pump, microwave and back-up
heater—all items that need surges of power—use grid power drawn from our
friend's house.

Plumbing. A mountain spring feeds the cistern that supplies water to our friend's house. We tap into that supply. We went with PEX water pipes
because PEX is flexible, inexpensive and easy to work with. Bill
watched YouTube videos to figure out the little he didn't already know.
As far as waste pipes go, we're careful about everything that goes down
our drains so it can be piped to a mulch pit. We're not on septic, so
urine also goes to its own pit. We deal with solid waste by composting it.

Insulation, walls and floor. With the electrical and plumbing installed, we insulated between the ceiling rafters with rigid foam and between the wall joists with EcoTouch Fiberglas. The walls went up fairly quickly with standard drywall; the ceiling
is light-weight (too light-weight) beadboard panels. We painted the
walls and ceiling white, knowing we would have dark wood floor and trim
For the floors we found a good deal on pine boards at Lumber Liquidators, then stained them with the same color as the exterior house.

Kitchen, bathroom and bedroom. We built interior walls to divide our space for a bathroom on one end of the house and sleeping space on the other. The interior bathroom wall also houses the water heater, plumbing, electrical, a medicine cabinet and the pantry. Both walls stop short of the ceiling for air flow and light. We went with a big sink, undercounter fridge, alcohol-burning stove, butcher block counters and IKEA cabinets in the kitchen. Besides the DIY composting toilet, the bathroom houses a mini sink and a metal-lined shower.

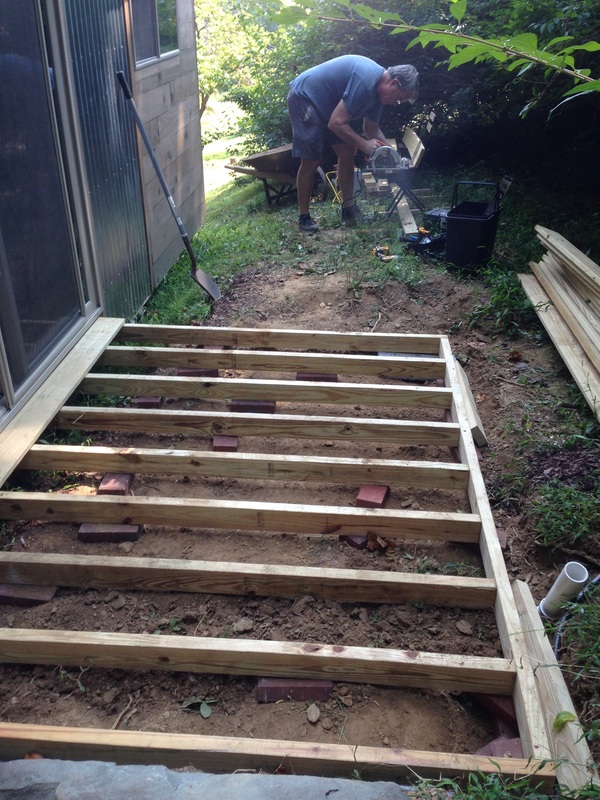
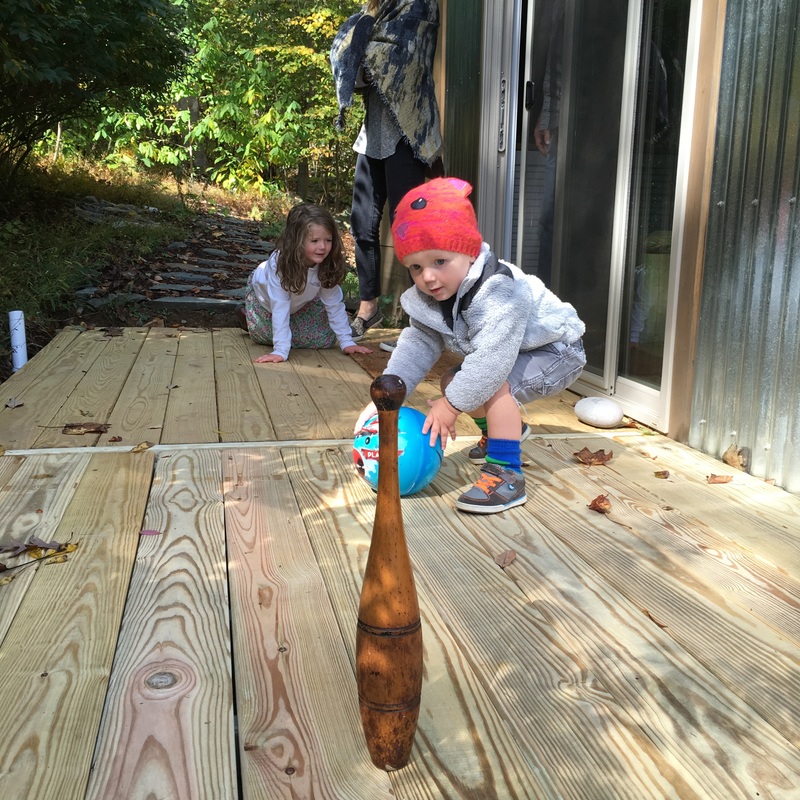
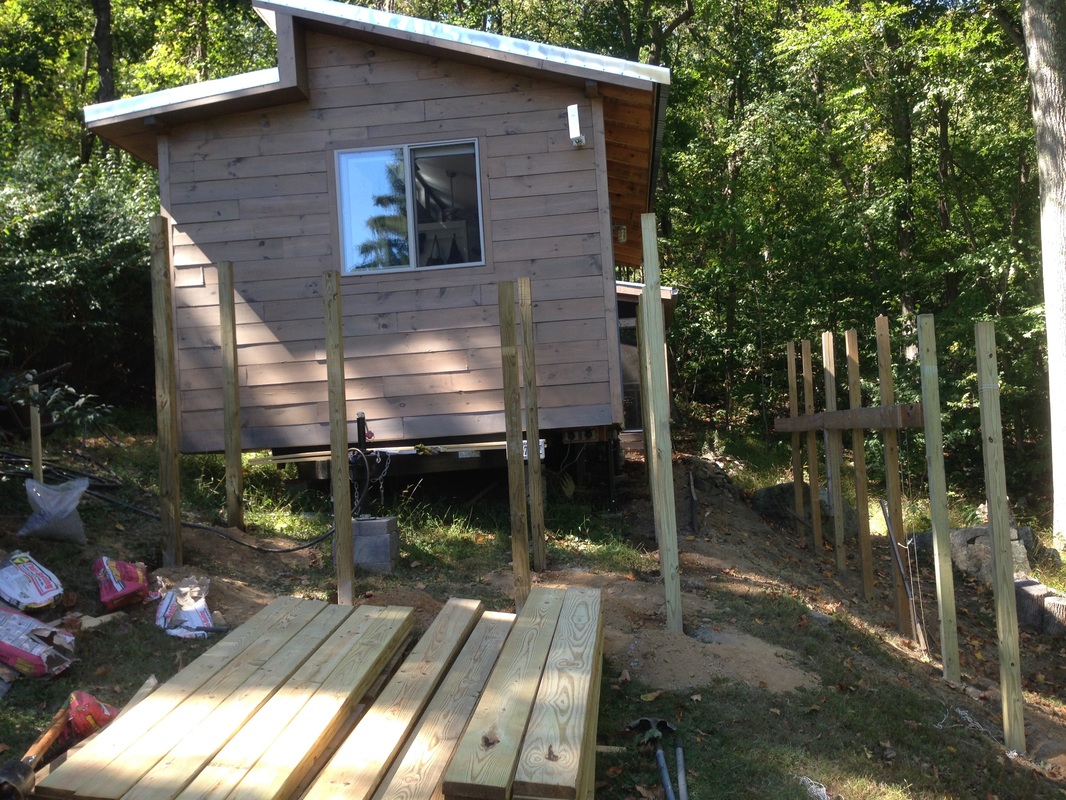
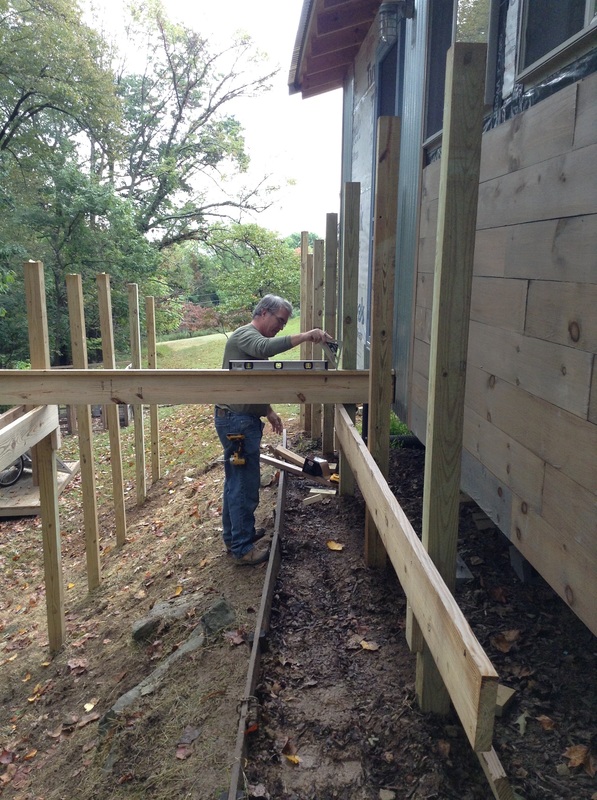
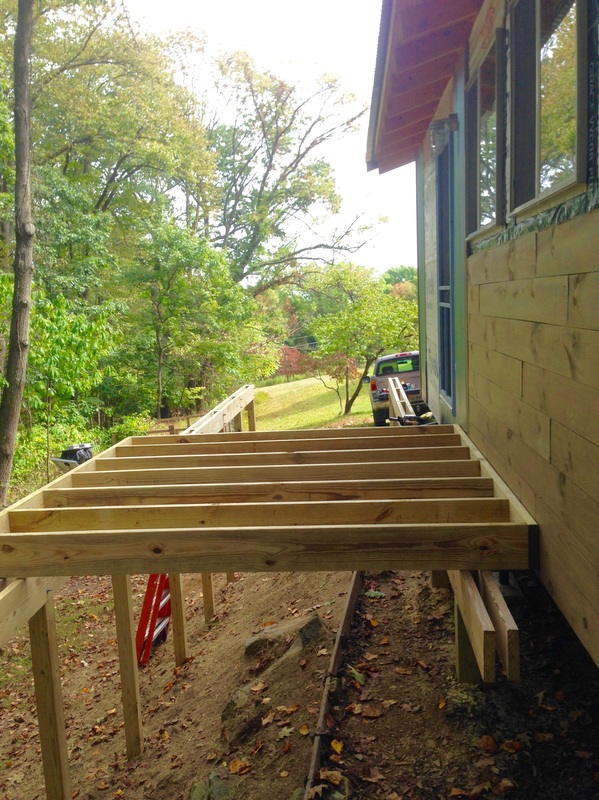
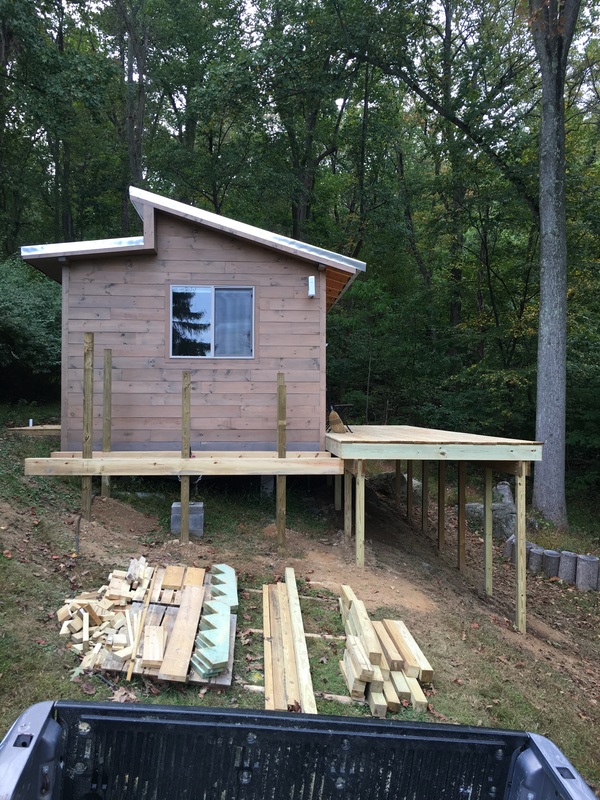
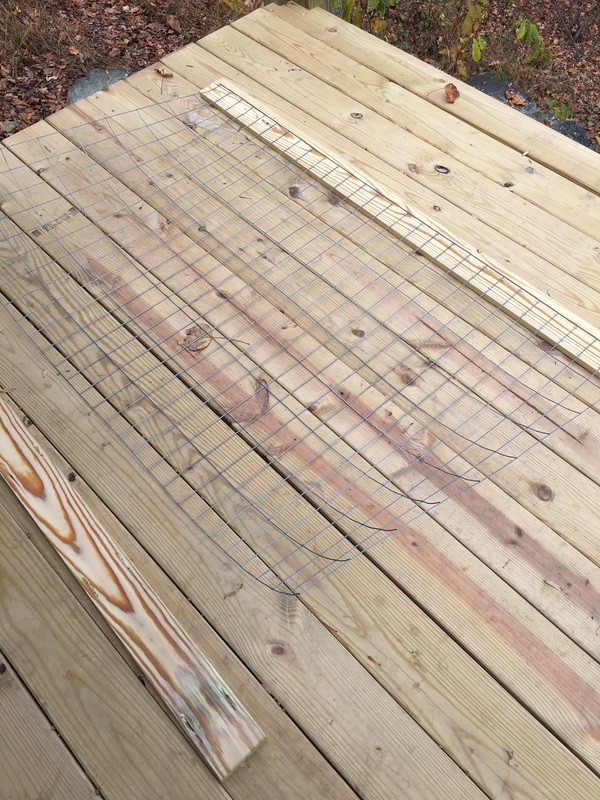
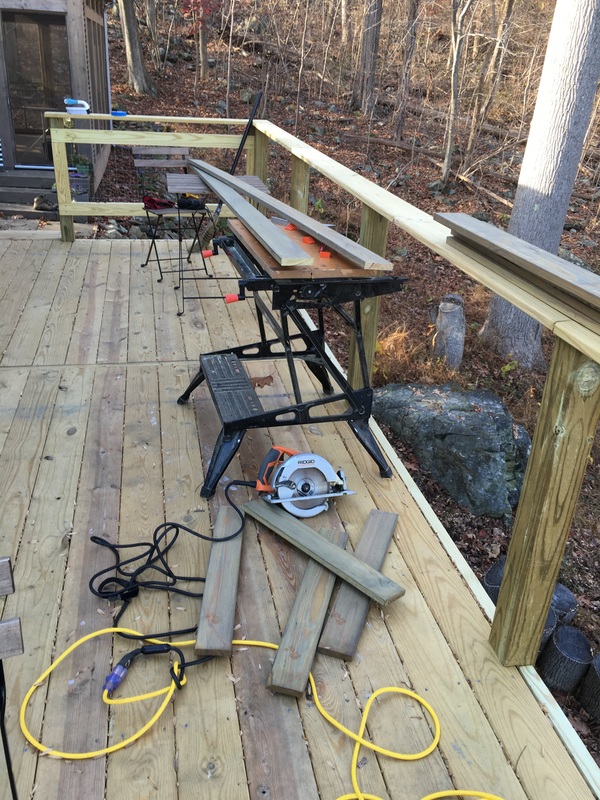
Deck. Most of the deck
went up after we moved in. It wraps around three sides and makes it
much easier to walk around the house, especially important given our
sloped mountain site. The deck also gives us plenty of room for grilling
and dining, growing herbs and having friends over. We've planted
grapes and hope they'll grow up the lattice that hides the trailer from
view. Still to come: planters outside the big glass sliding door.
A year after we started our build, we moved in. We finished the deck seven months after that. There's much I've skipped (the wood stove install, for example), so let us know if you have questions about the steps I've passed over here. (Or the steps I included!)
4 Comments

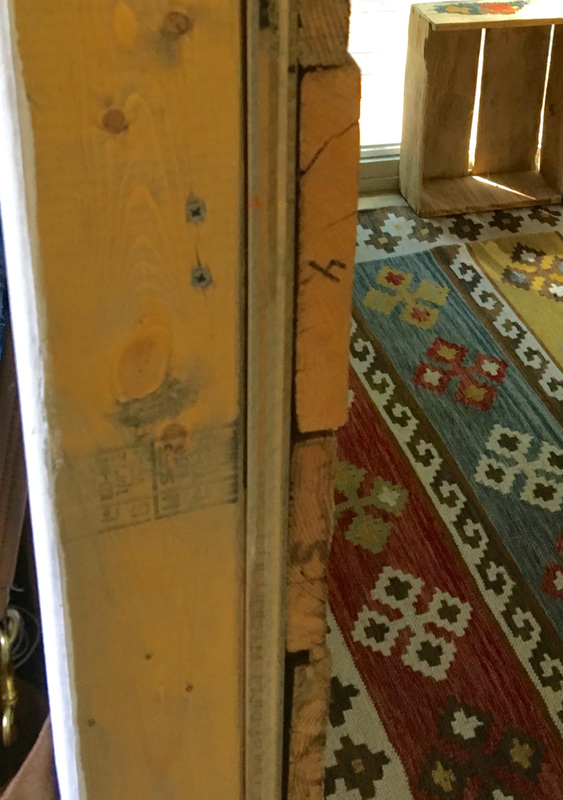
Recently I posted pictures of the barnwood wall behind our sofa and mentioned it was 90% complete. We ran out of steam before we got around to measuring, cutting and installing trim along the edges and top.
And there were the two posts that support the clerestory windows: they were also missing a decorative sheath. Ditto for the bathroom doorway.
I'm happy to report the trim is (finally!) in place. It's amazing how much more finished a look it gives our space.
(Now if I could only remember to install the two feet of missing floor trim—already painted and ready to go!—then I could say we've finished off our space.)
Please click on the pictures below for more details.


I
have never been known for my patience. In the past, when I wanted
something done, I wanted it done yesterday. Building this tiny house has
been something of a lesson in patience. Take our new slate, for
example.
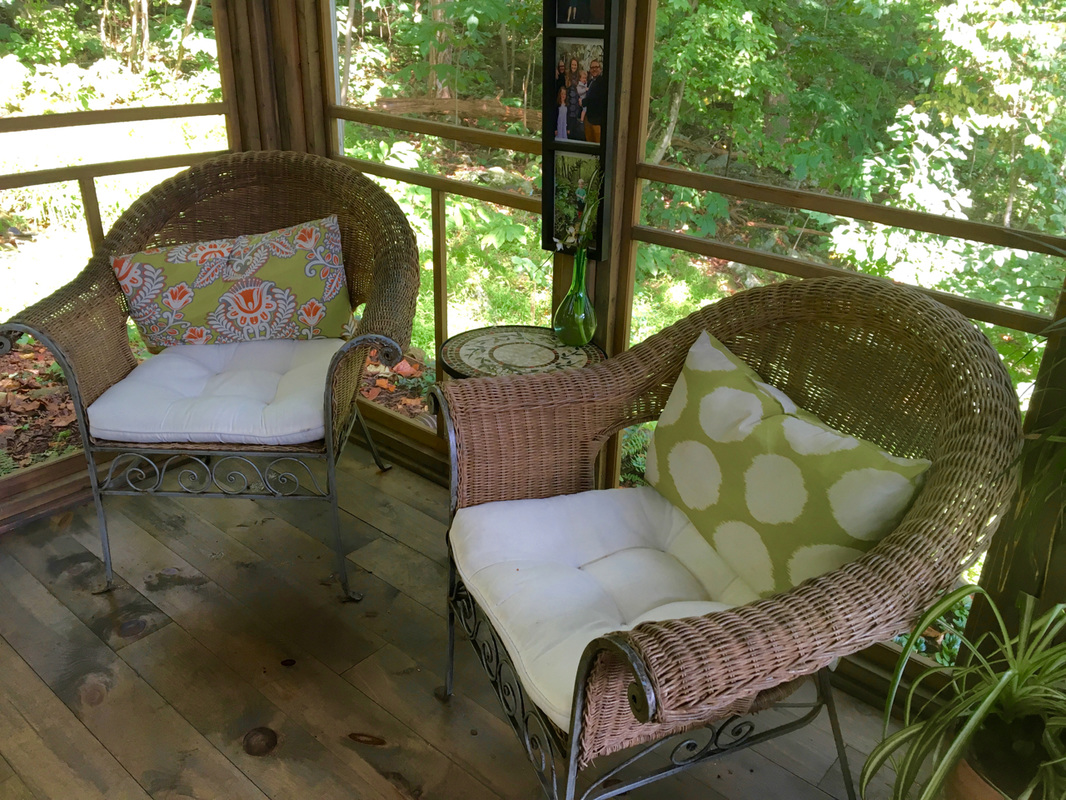
We built our tiny house about ten feet away from the screen "house" we built first. The screen house is an open air living space for about 8 months of the year. It's part of what makes our tiny house not feel quite so tiny, and we walk between our two living spaces several times a day. In the screen house, we have a primitive kitchen (cooler for a fridge, a sink that empties into a bucket), a table for dining and a much-used lounge area. But back to the slate...
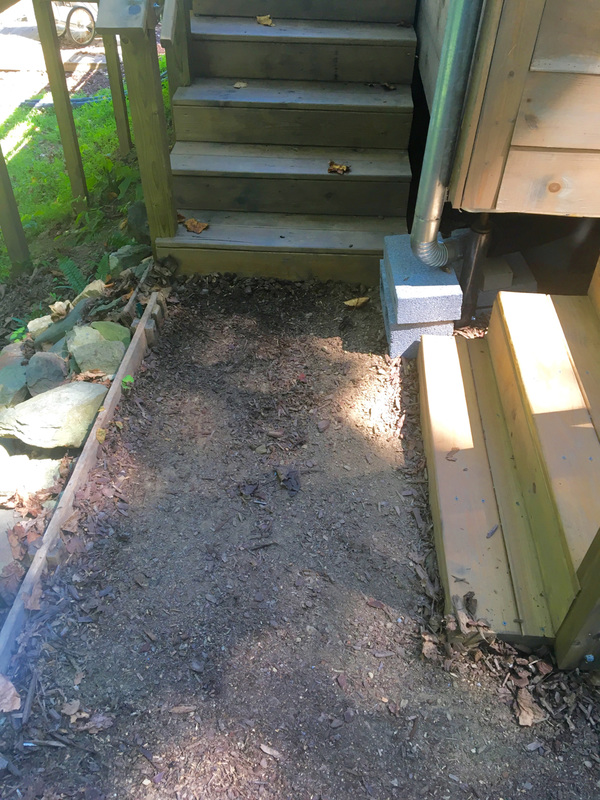
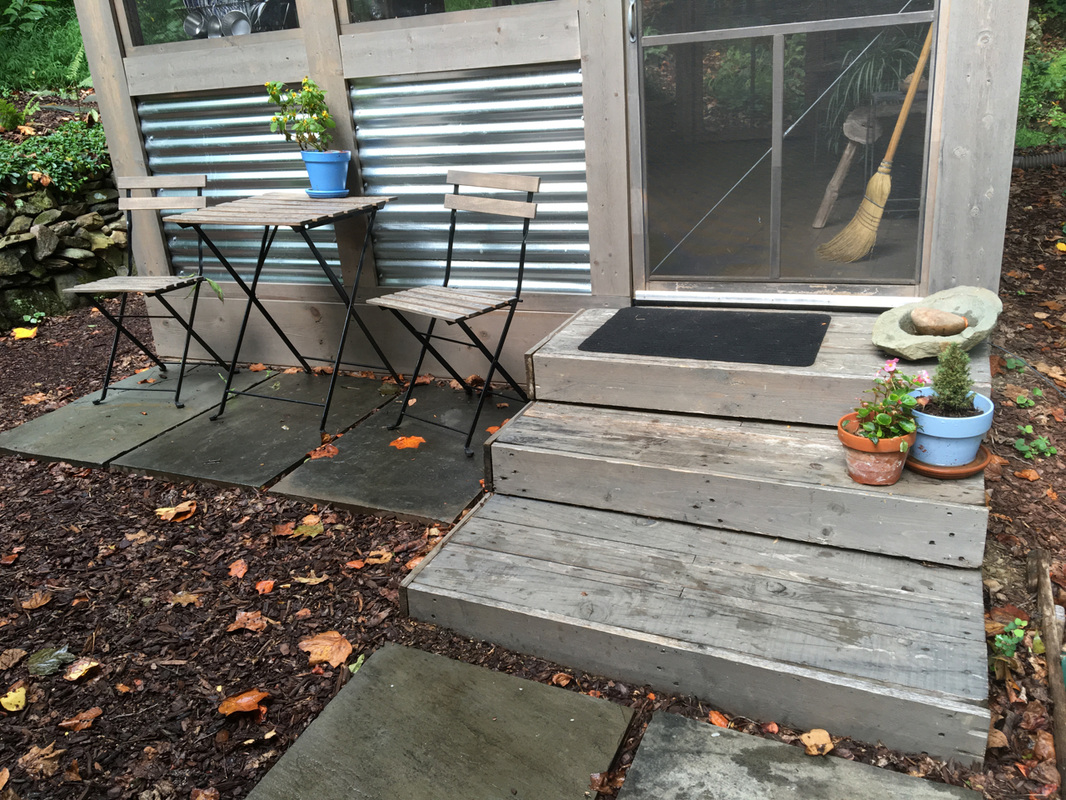
Two sets of stairs lead down from the tiny house to stairs up to one of the screen house doors. For more than a year, we've had to step down on to dirt or mulch to cross between our living spaces. (Imagine all my dirty feet and socks...) We had a few hundred ideas about what to do in the gap between the houses, and we actually took the time to weigh them. What would each cost? Would they reflect or clash with what's already on site? How much time would be required, time taken away from other projects? We thought long and hard about what we wanted, and we came to this conclusion: we wanted a walkway of slate slabs between the houses.
The next lesson in patience came when we looked at the cost of slate slabs. At local nurseries and hardware stores, we found prices between $200 and $300 to buy enough slabs the size and thickness we wanted. The walkway wasn't enough of a priority to justify the hit to our bank account. That's when Bill turned, once again, to Craigslist.
He kept his eye out for slate (among a few other wish-list items) and, after a few months, he found it. We paid $15 a slab for pieces larger than what we had been looking at. The walkway cost us only $30, once we realized we could make use of a couple pieces of slate we already had on hand. The 2x3' slabs were so reasonable, we spent another $60 and had enough to put slate at the bottom of another set of stairs off the deck and under a little table and chairs that had previously teetered on dirt.
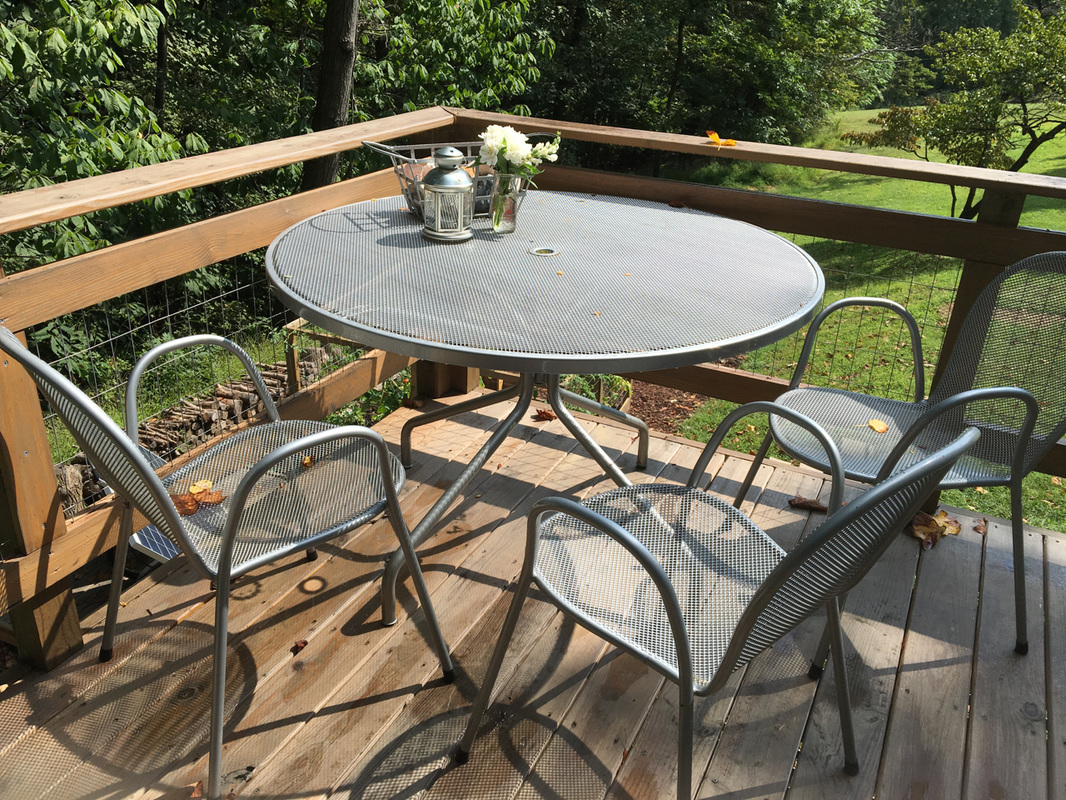
That's neither our first nor, hopefully, our last Craigslist find. The set of wicker furniture that we lounge on in the screen house cost less for all four pieces than the price of some new chairs. And then there's the beautiful, metal Emu chairs and table on the deck—in great shape and also a fraction of the price if bought new. We've also scored free landscaping stones and lumber.
Yes, you have to wade through a boatload of ridiculously hideous and/or overpriced items, not to mention scams, on Craigslist—but, with a little patience, Craigslist can be the tiny house builder's best friend.
We built our tiny house about ten feet away from the screen "house" we built first. The screen house is an open air living space for about 8 months of the year. It's part of what makes our tiny house not feel quite so tiny, and we walk between our two living spaces several times a day. In the screen house, we have a primitive kitchen (cooler for a fridge, a sink that empties into a bucket), a table for dining and a much-used lounge area. But back to the slate...
Two sets of stairs lead down from the tiny house to stairs up to one of the screen house doors. For more than a year, we've had to step down on to dirt or mulch to cross between our living spaces. (Imagine all my dirty feet and socks...) We had a few hundred ideas about what to do in the gap between the houses, and we actually took the time to weigh them. What would each cost? Would they reflect or clash with what's already on site? How much time would be required, time taken away from other projects? We thought long and hard about what we wanted, and we came to this conclusion: we wanted a walkway of slate slabs between the houses.
The next lesson in patience came when we looked at the cost of slate slabs. At local nurseries and hardware stores, we found prices between $200 and $300 to buy enough slabs the size and thickness we wanted. The walkway wasn't enough of a priority to justify the hit to our bank account. That's when Bill turned, once again, to Craigslist.
He kept his eye out for slate (among a few other wish-list items) and, after a few months, he found it. We paid $15 a slab for pieces larger than what we had been looking at. The walkway cost us only $30, once we realized we could make use of a couple pieces of slate we already had on hand. The 2x3' slabs were so reasonable, we spent another $60 and had enough to put slate at the bottom of another set of stairs off the deck and under a little table and chairs that had previously teetered on dirt.
That's neither our first nor, hopefully, our last Craigslist find. The set of wicker furniture that we lounge on in the screen house cost less for all four pieces than the price of some new chairs. And then there's the beautiful, metal Emu chairs and table on the deck—in great shape and also a fraction of the price if bought new. We've also scored free landscaping stones and lumber.
Yes, you have to wade through a boatload of ridiculously hideous and/or overpriced items, not to mention scams, on Craigslist—but, with a little patience, Craigslist can be the tiny house builder's best friend.


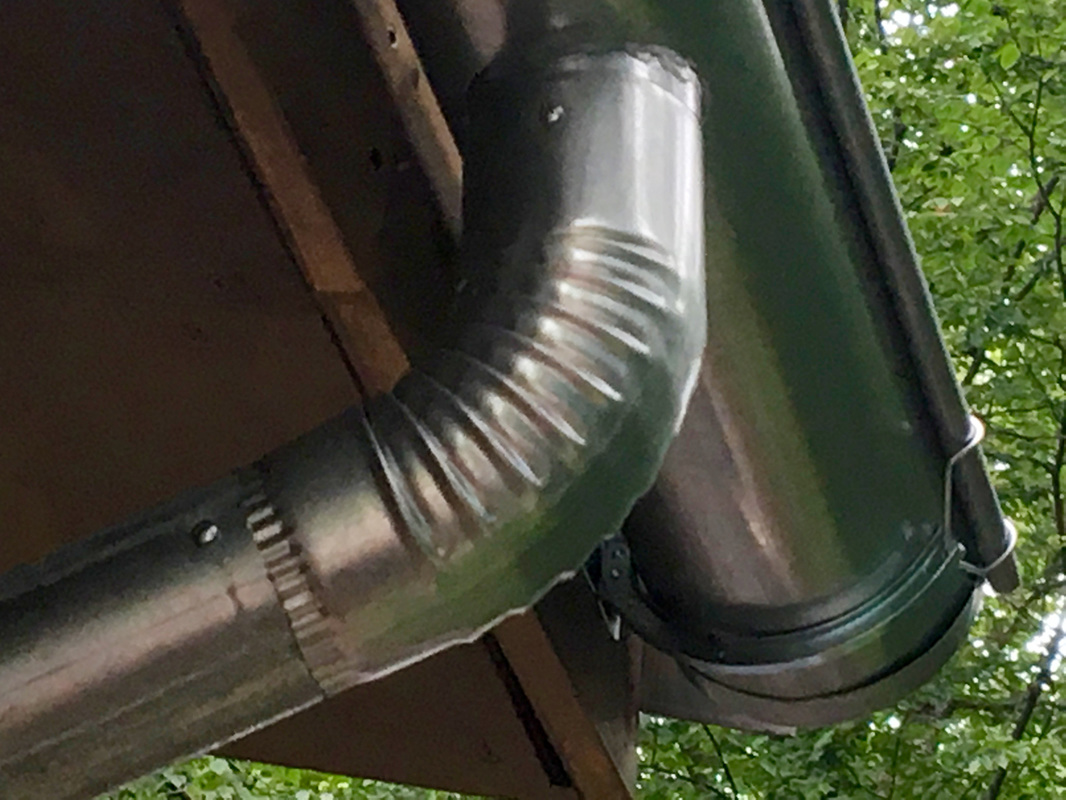
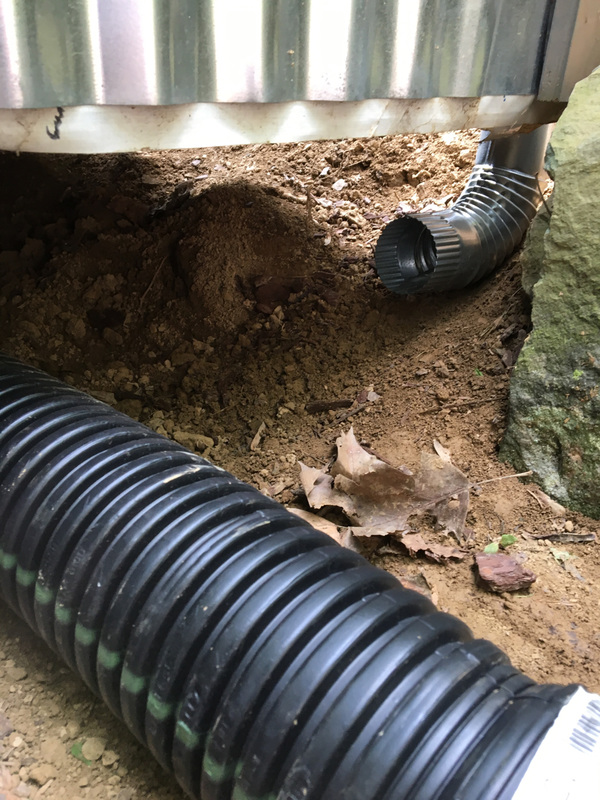
When
we moved into the house a year ago, gutters were still on the to-do
list—along with the deck and stairs. While we finished the other
projects a bit ago, the house remained gutter-less. The delay was caused
by someone (that would be me) who really wanted half pipe galvanized
gutters for aesthetic reasons.
We finally found all the supplies we needed, and just today Bill finished the gutter project! It's still a work in progress, though, because we plan on adding rain barrels under the deck to collect water for vegetable gardening. Now we just need to find food-grade barrels that will fit in the space we have. In the meantime, the rain water will just run off down the hill.
We finally found all the supplies we needed, and just today Bill finished the gutter project! It's still a work in progress, though, because we plan on adding rain barrels under the deck to collect water for vegetable gardening. Now we just need to find food-grade barrels that will fit in the space we have. In the meantime, the rain water will just run off down the hill.

We took a deep breath after we finished the deck project,
and it wasn't until we had a couple families coming to visit that we
felt motivated enough to tackle the next project: proper stairs leading
to the kitchen door. Our "construction grade" stairs (narrow and railing-less) needed a safer, more aesthetically pleasing replacement.
In the end, we decided to build a deck-lette just outside the door, with stairs leading down the side of the house. This way, we could save the space between the tiny house and the screen house as a courtyard of sorts and have three sets of stairs leading to the same landing. Once we score a few more squares of slate to add to the two salvaged pieces we already have, we'll be able to cross from the deck to the screen house, or the screen house to the tiny house, stepping across slate instead of the ground.
In the end, we decided to build a deck-lette just outside the door, with stairs leading down the side of the house. This way, we could save the space between the tiny house and the screen house as a courtyard of sorts and have three sets of stairs leading to the same landing. Once we score a few more squares of slate to add to the two salvaged pieces we already have, we'll be able to cross from the deck to the screen house, or the screen house to the tiny house, stepping across slate instead of the ground.


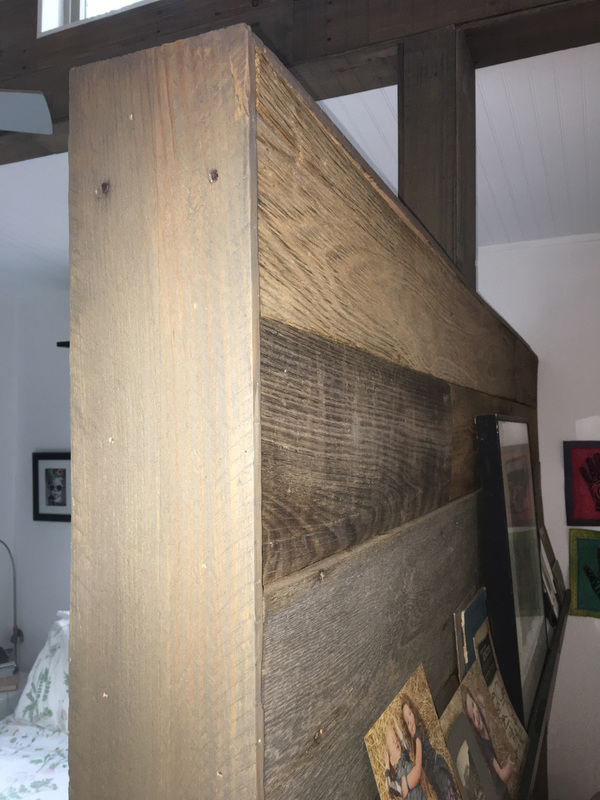
After posting the other day about reclaimed materials,
a friend reminded me that I'd never posted a picture of the completed
"living room" wall. While I can't actually claim it's 100% completed
(still missing a board at the bottom and trim on the edge...), I can say
I think the old wood we attached to the plywood wall has transformed
the room for me. It's warmer and richer, and I love the contrast with the white walls around it.
We recovered the wood from a collapsed outbuilding up the mountain. Much of it was rotted and needed to be cut away. We cleaned and sanded the best of the wood, then cut off any bad edges and sorted it by width. We thought we might want to stain it, but decided we liked it just the way it was.
And now...the neighbors up the mountain with the collapsed outbuilding have told us they have more wood we might be interested in. Who knows what we'll use it for?

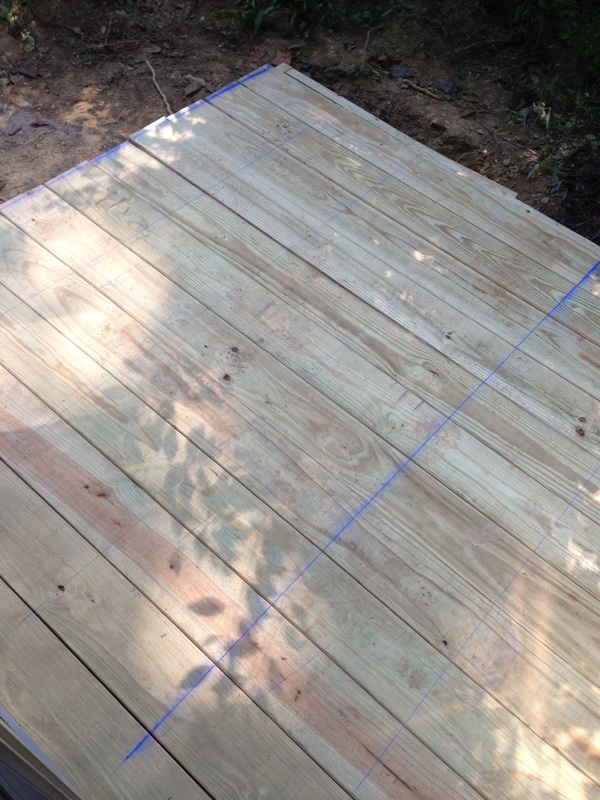
We
live at the edge of a forest. We wanted the house to suit its natural
setting, so we looked for a wood stain that would blend with the trees
around us. While the hue we picked ("Pewter") didn't turn out quite as
gray as the bark we were hoping to match, we've been happy with the
color.
Putting up the deck—in all its new wood glory—reminded us what a difference the stain makes. We're happy to say now that the deck blends in a little better these days, thanks to another gallon of stain.
Now, there's just those railings to finish...and vertical garden to plant...and...
Putting up the deck—in all its new wood glory—reminded us what a difference the stain makes. We're happy to say now that the deck blends in a little better these days, thanks to another gallon of stain.
Now, there's just those railings to finish...and vertical garden to plant...and...


We
have 250 square feet of living space inside our house. We've added
another 420 square feet of living space outside—otherwise known as our
deck. Unlike many tiny houses built on wheels, the plan is for ours to
stay put. Technically, the deck is freestanding (therefore, not a part
of the house) and modular (sections could be lifted out whole), but we
have no intention of packing up and moving either the deck or the house.
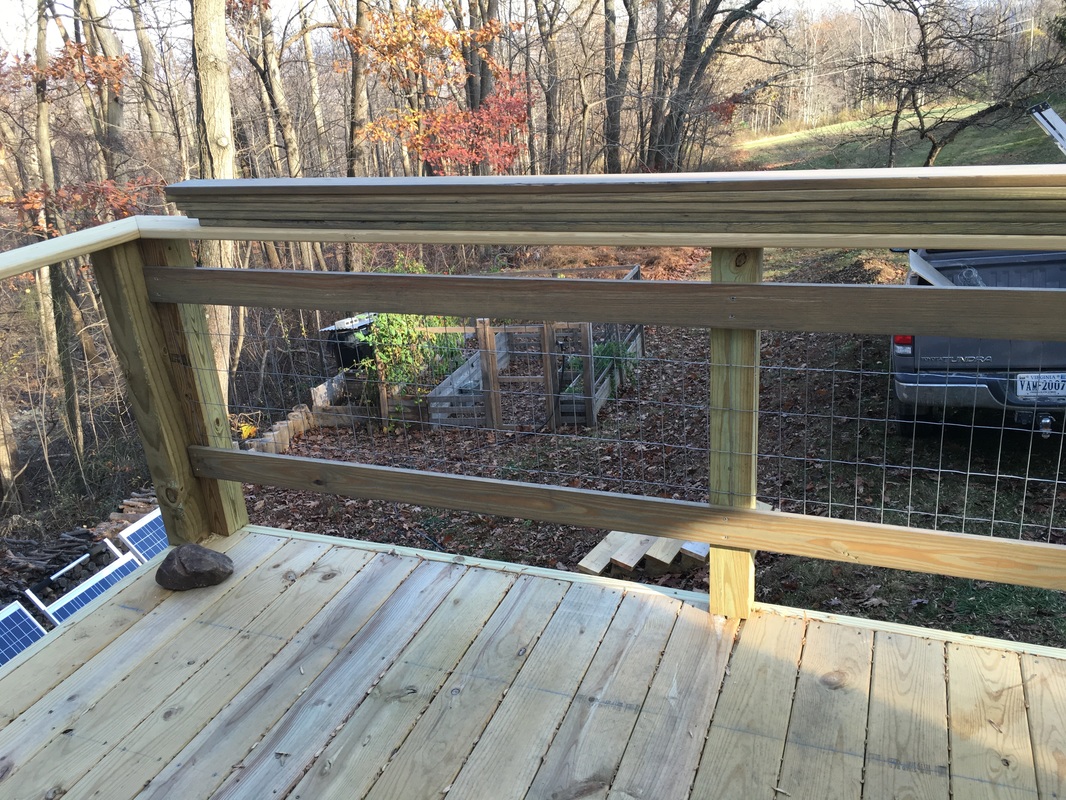
We live on a semi-terraced hill. Before the deck, the land outside our sliding door sloped down, leaving a gap between the ground and door. (While running around one day, our grandson slid down through that gap and landed under the trailer our house is built on.) On the opposite side of the house, another door opened four feet above the steeply sloped ground. (Perching on ladders to install the siding on that side of the house was near impossible.) Now, we walk out both doors onto a solid, level surface—and no one's slipped down under the trailer again.
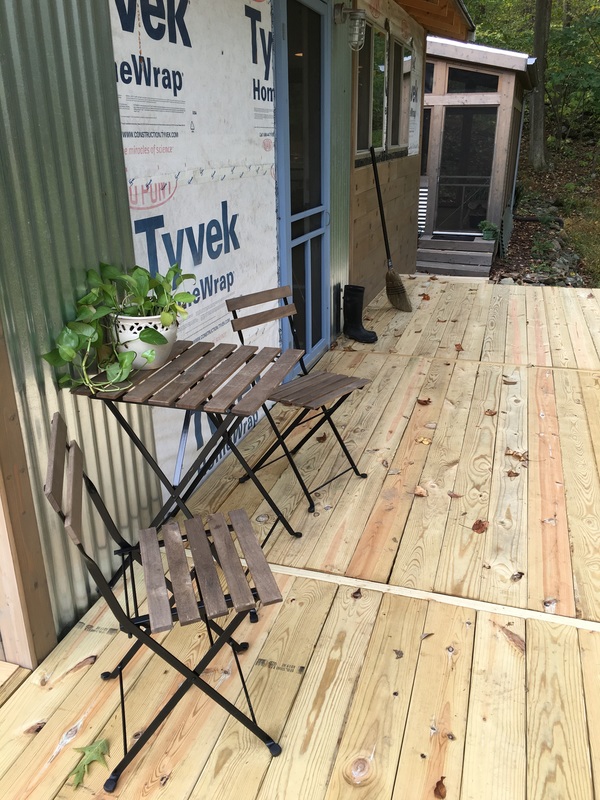
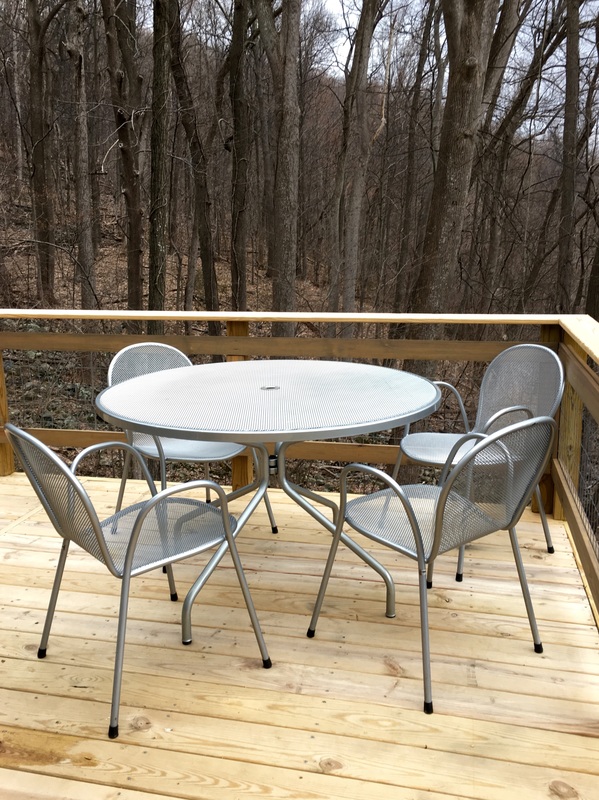
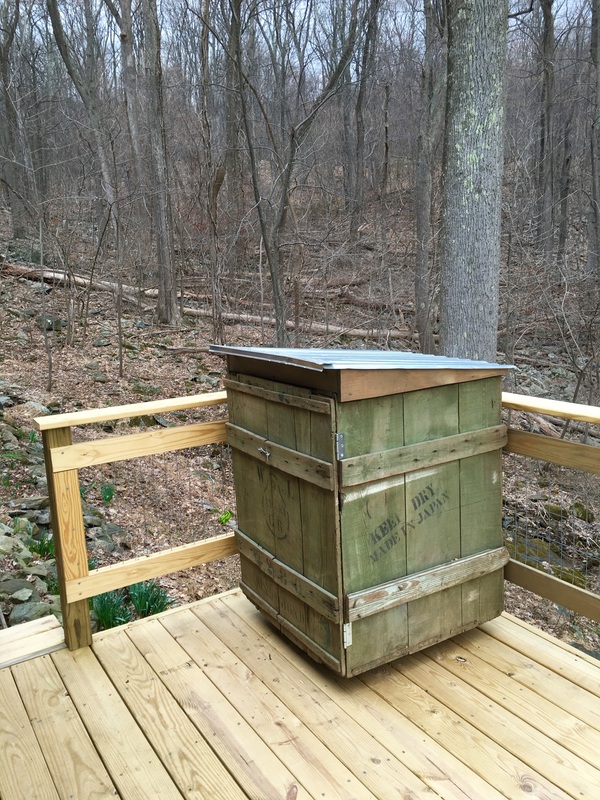
Still a work in progress, the deck wraps around three sides of the house. In fair weather, it will function as our second kitchen and dining room. We've already hauled our wood box (a reclaimed shipping crate) onto the deck and sketched out plans for a table we'll build beside it for our wood-burning grill. When it's time to eat, we have a steel table and chairs (a great Craigslist find).
Next month, we'll install planting beds on the sunny, southeast side of the deck so we can transplant oregano, lemon verbena, rosemary, sage and mint already growing in our garden—and plant new basil, cilantro and more. Whether cooking inside or out, we'll have fresh herbs on hand.
In the meanwhile, we have railings to finish and the entire deck to stain. (We waited to let the wood dry out completely so it can absorb the stain; eventually it will be the same color as the house.) We also have earth to sculpt and landscape, so that mud stops washing down the hill onto the deck outside our sliding door. Oh, and there's also the stairs to build outside the kitchen door.
So, lots of work still to go on the deck, but we're looking forward to completing it. Between the screen house that's already in place and the deck that's almost finished, we plan on living in our 580 square feet of outdoor "rooms" as much (or more!) than we do inside these four walls. Here's to temperate weather!
Please click on the photos below for more details.
We live on a semi-terraced hill. Before the deck, the land outside our sliding door sloped down, leaving a gap between the ground and door. (While running around one day, our grandson slid down through that gap and landed under the trailer our house is built on.) On the opposite side of the house, another door opened four feet above the steeply sloped ground. (Perching on ladders to install the siding on that side of the house was near impossible.) Now, we walk out both doors onto a solid, level surface—and no one's slipped down under the trailer again.
Still a work in progress, the deck wraps around three sides of the house. In fair weather, it will function as our second kitchen and dining room. We've already hauled our wood box (a reclaimed shipping crate) onto the deck and sketched out plans for a table we'll build beside it for our wood-burning grill. When it's time to eat, we have a steel table and chairs (a great Craigslist find).
Next month, we'll install planting beds on the sunny, southeast side of the deck so we can transplant oregano, lemon verbena, rosemary, sage and mint already growing in our garden—and plant new basil, cilantro and more. Whether cooking inside or out, we'll have fresh herbs on hand.
In the meanwhile, we have railings to finish and the entire deck to stain. (We waited to let the wood dry out completely so it can absorb the stain; eventually it will be the same color as the house.) We also have earth to sculpt and landscape, so that mud stops washing down the hill onto the deck outside our sliding door. Oh, and there's also the stairs to build outside the kitchen door.
So, lots of work still to go on the deck, but we're looking forward to completing it. Between the screen house that's already in place and the deck that's almost finished, we plan on living in our 580 square feet of outdoor "rooms" as much (or more!) than we do inside these four walls. Here's to temperate weather!
Please click on the photos below for more details.


We
moved into our house the beginning of August. Most of the interior work
was complete by then, but we still had some trim work and one wall we
wanted to line with barn wood like we'd used on our bathroom door. Six months later, we still have that trim work and wall to work on...but we have gotten started.
We've scavenged wood from up our mountain and down. A neighbor down the road offered us boards from a barn being pulled down. Up the road, neighbors offered us more boards from a collapsed outbuilding. After cutting out broken sections, we cleaned and sanded the boards, then sorted them by size. We're squaring the ends, ripping clean edges and cutting boards to fit the wall. With any luck, our next blog update will have a picture of the finished wall.
As for the trim, it's coming from shipping pallets. After doing some of the initial trim work inside the house, we had to collect a few more pallets. Now we need to saw them apart to sort, sand and stain boards to sheath our two posts and finish off the ends of the bathroom and bedroom walls.
Please click on the photos below for more details. Find more on our wall work here: http://simplyenough.weebly.com/building/we-have-walls-most-of-them-anyway.


We've
been using an above-ground potable water hose to bring water from our
friend's house to the tiny house since finishing construction in
August. It was meant to be our temporary water supply.
Yes, we meant to winterize our water supply. But, no, we didn't finish the project in time. The result: We had to temporarily cut off water to the house this week so the hoses and spigot wouldn't freeze. That means no showers and lots of toting water in jugs until the water supply gets hooked up again. (Don't worry, we have alternative locations for showering!)
While temperatures remained unseasonably warm, we put off the water project to work on the deck (which we love), stockpile right-sized logs for the wood stove (which keeps us warm) and fest our way through the holidays (which we enjoyed). What we didn't finish was insulating and under grounding the water pipes that lead to our house and installing, connecting and insulating the 78-gallon drums we intended to set up as a our winter-time reservoir. The idea was that we'd run water through an underground pipe from our friend's house once every week or two to fill the drums, then we could turn off and drain her spigot to prevent freezing any pipes.
But in addition to all the other projects we have going on, we've been busy taking care of my mother-in-law, who suffered a stroke just before Thanksgiving. I'm happy to say my mother-in-law is doing as well as could be expected, but the lesson for us here is that we can't count on days staying unseasonably warm and families members staying healthy. In hindsight, it's clear the project should have been completed weeks if not months before winter so there would be time to spare if/when something unexpected came up.
In the meanwhile, we're practicing resiliency as we carry in our water and think more carefully about our consumption. We're also drawing up a list of tiny house priorities so that we'll work on projects that are time-sensitive (like water pipes!) before we get lost in pet projects. Live and learn, right?
More on our water supply when we get the new system up and running